
How to Create a Writing System – 5 Tips for Your First Draft
Interested in writing a novel, but can’t figure out a solid writing system to finish your first draft? My friend, I’ve been there!
Today, I’m sharing some encouragement and tactics that helped me make it through that often daunting feeling of writing your first novel—specifically, your very first draft.
Embarking on the journey of writing a novel can feel like navigating through uncharted wilderness. The path from the first word to the last period isn’t always clear and often blocked with challenges, twists, and turns that can test the stamina of even the most determined writers. This is where developing an effective writing system becomes crucial. A well-structured writing system not only serves as a compass to guide you through the dense forest of your ideas but also ensures that you emerge on the other side with a completed first draft in hand.
Now, because people have written entire books on how to write a novel, I’m going to keep this succinct and more of an overview of what’s worked for me. If you’d like to talk more, just let me know! I’m happy to help where I can.
Without further ado, here are my five favorite tips to help you soar through your first rough draft and create a writing system that works for you. Let’s do this!
Step 1: Complete Your Pre-Writing Tasks
Pre-writing tasks? There are things to do before you start writing a rough draft?
Why, yes, there are. I’m glad you asked!
Think back to what you were taught in school: start with an outline or brainstorm. Turns out, teachers really did know what they were talking about despite what we thought as middle and high schoolers.
There are a number of things you can and should do before you start writing your first draft. Each of these tasks will make writing your rough draft faster, less stressful, and more fun. And hopefully cut down on the time you spend staring at the blinking cursor wondering what to write.
Research
If you’re like me, researching and learning about new topics is exciting and something you can lose yourself in. If you perhaps got the love of learning new things beaten out of you, firstly I’m sorry. Secondly, I invite you to discover how fun researching for your book can be!
What could we possibly need to research for a novel? For something made up? For my portal fantasy novel that starts in our world in the Central Coast, I did research by taking trips up there, scouting out the setting and atmosphere so I could better write about it.
You definitely can write about places you’ve never been. The internet is great for that. But if you needed an excuse to take a research trip, here it is…You’re welcome.
I also researched Irish fairy tales and lore (and if you were wondering, no I didn’t have the money to travel to Ireland to research…need to sell my first book before that’s going to happen). Since I have some sword fighting in my book, I researched different swords, their names, how to describe them, etc.
Have a brainstorming session where you write down all the things you made need to research for your book, then go research them! I like to keep a digital binder in my Scrivener file for the novel I’m working on with all my research in it so I can refer back to it whenever I need to. You can create a file on your computer, start a journal, or even a manila folder with your research.
Create an Outline

I know that some people divide writers into two camps: “plotters” and “discovery writers”. Plotters are those of us who like to outline our story and think through plot holes and what’s going to happen before we write. Discovery Writers like to dive in and let the story take them where it wants to go, not really thinking about where it will go.
To some extent, I think everyone plans or outlines in a way. You need to know where your story is going to go. What will the theme be? What do you want the reader to walk about with? A certain lesson learned? A feeling?
Even if you don’t have every plot hole thought through, there is some amount of planning that you go through to figure out what kind of story you want to tell.
When you have an outline and know the bones of the story, that can guide you when you’re feeling stuck. Later, you can always change things! You’re not married to your first outline. Mine has changed many times as my story has grown and transformed, and that’s okay.
Step 2: Set a Writing Schedule or Deadline for Yourself
After you finish your pre-writing tasks, you’re ready to really dig in. Let’s get you writing!
Sometimes, one of the hardest parts may be sitting down and actually writing. Somehow, chores or tasks we’ve put off have found a way to the forefront of our minds, taking us off track and before we know it, we’ve spent 3 hours organizing the closet instead of writing like we wanted to.
Set a goal for yourself! Do you want to write thirty minutes a day? One hour a day? Five hundred words a day? A thousand words a day? Pick what works for you and stick to it. Protect your time like you’re protecting the last special Christmas cookie that mom only makes for the holidays.
During these times, make sure you’re ONLY writing. Not researching, editing, or revising. My tried-and-true writing system is using the Pomodoro Technique for my writing sessions: working for 25 minutes, resting for 5 minutes, and repeat. (To help you with these sessions, I included links to writing timers and fun atmospheric videos and music later on in this post).
Once you’ve established a time during the day you’re going to write, tell everyone around you. Make sure they’re aware of your writing time so they can respect it. This also doubles as accountability. Yes, we need it!
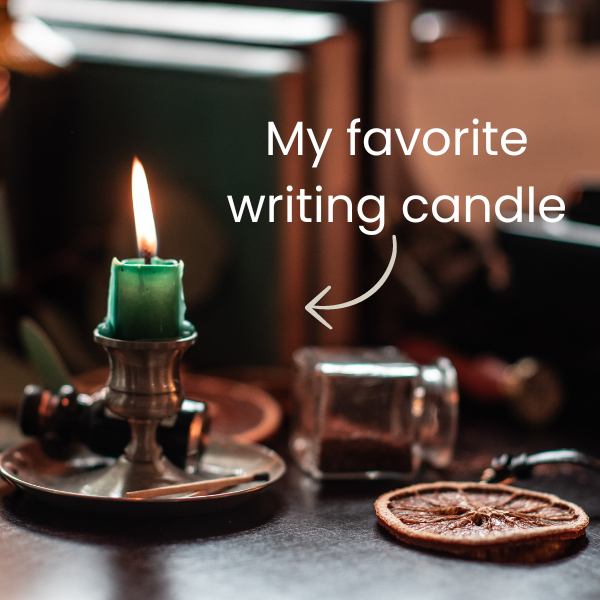
Bonus Tip: Make your writing time fun and something to look forward to! Create rituals that help your brain know it’s time to write. You can light a candle that’s your “writing candle.” Make special writing time tea. Find little ways to help you get excited!
Step 3: Adjust Your Writing Expectations
A rough draft is exactly that. Rough. No one writes a masterpiece rough draft. Not even Tolkien, Lewis, Rowling, or Gaiman.
Putting this expectation on yourself is extremely unrealistic. “Perfectionism kills,” they say. And it really does kill your creativity. From the beginning, tell yourself it’s okay if what you write on your first go doesn’t set the world on fire. Allow yourself the freedom to have fun! Explore! Write something just because you want to.
For me, writing is the most fun part. It’s where you get to have no guard rails. You can wander down the path and create something magical.
Remember: Your first draft is just for you, no one else! Making it shine comes in way later in the editing and revisions stage. Keep that critical voice out of this stage of the process. Don’t spend too long agonizing over making a certain paragraph perfect or you’ll find you never finish your rough draft. Make a note to come back and fix it, then move on.
This isn’t something I’m perfect at by any means. I still need reminders all the time that writing is rewriting. In the moments where I do sit down, stare at the blank page, smile, and just have fun creating something for the joy of it, I remember why I wanted to write in the first place. Getting to create something out of nothing is one of the most extraordinary things we can do.
Step 4: Write in Different Places
If you’re like me, you need a writing system that keeps you on track while also stimulating your creativity. That’s why I love to switch up where I write. Most of the time I write at my desk at home. But after a while, I get cabin fever and go stir crazy. I recommend writing somewhere that’s inspiring to you!

I like to go to different cafes, my local library, a park, a local arboretum. Going to different places helps me reset my creative brain. If you’re feeling stuck, go somewhere else to write. There’s something about a change of scenery that helps shift perspective. Find a place to go that makes you feel inspired! And don’t forget to bring snacks and tea.
Step 5: Track Your Writing Progress
Writing can be a daunting process. That’s why my final tip for a strong writing system is to track your progress. Depending on the size of your project, it can take a very long time to get through it. That’s why it’s important to look back and reflect on how far you’ve come. Not only is it motivating too look back on the obstacles you’ve overcome, but it makes you feel accomplished. Which you are! 🙂
Personally, I use Scrivener to make Project Targets and word count goals. It breaks down my goals and tells me how much I need to write each day. So helpful!
You can also keep a calendar and write down what you wrote that day so you can see your progress over time. Some people use spreadsheets to track progress as well. Find what works for you and remember to look back often and pat yourself on the back for all the hard work you’ve put in.
Additional Writing System Resources
Because I love gathering information, I also love sharing it. If you’ve taken the Strengthsfinder test and are familiar, Input is one of my top 5 strengths. That means I research a lot, gather all pertinent info, sift through finding the best, and love sharing it with others. I can’t resist!
These tools have helped my writing systems so much, I want everyone to know about them. So, here are some helpful resources and websites that have helped me write my first rough draft.
- Three act story structure, a tool used to write all great stories (which I will talk about in an upcoming blog), to help me outline the rest of my story and fill in scenes to help my characters grow and get them to the end of the story.
- The Snowflake Method which helped me think through my story in a big picture, then zoom in to a more granular level.
- K.M. Weiland’s website, helpingwritersbecomeauthors.com, helped me think through the theme, character development, and pacing of my novel.
- Abbie Emmons’s YouTube channel pushed me to think through my characters’ motivations and false truths they were believing. This helped me strategize creating characters that people cared about.
- These immersive writing sessions are timed so you can do writing sprints when you really need to focus and get words down. I love these!
- Otter.ai is a free voice dictation app that I used to dictate parts of my rough draft. Sometimes it’s easier to just talk out loud and say the words you want to put on the page. That way, you can’t see them or judge the words. You let them flow, and then go back and add them to your manuscript later. It’s amazing how many words you can get added to a project when you speak them. Dictating also helped me get out of my head and just say the words I wanted to say instead of seeing them on the screen, judging them, or doubting them and getting stuck for a while.
- TheCreativePenn.com has been an invaluable resource to me from her website to her podcast to her books for authors. HIGHLY recommend looking at her website. She’s been in the business for 15+ years and has infinite wisdom!
I hope this was helpful for you! Remember, any writing you do counts. You can do this! I believe in you. Now go have fun with your rough draft.
Keep Dreaming,
K.T.